

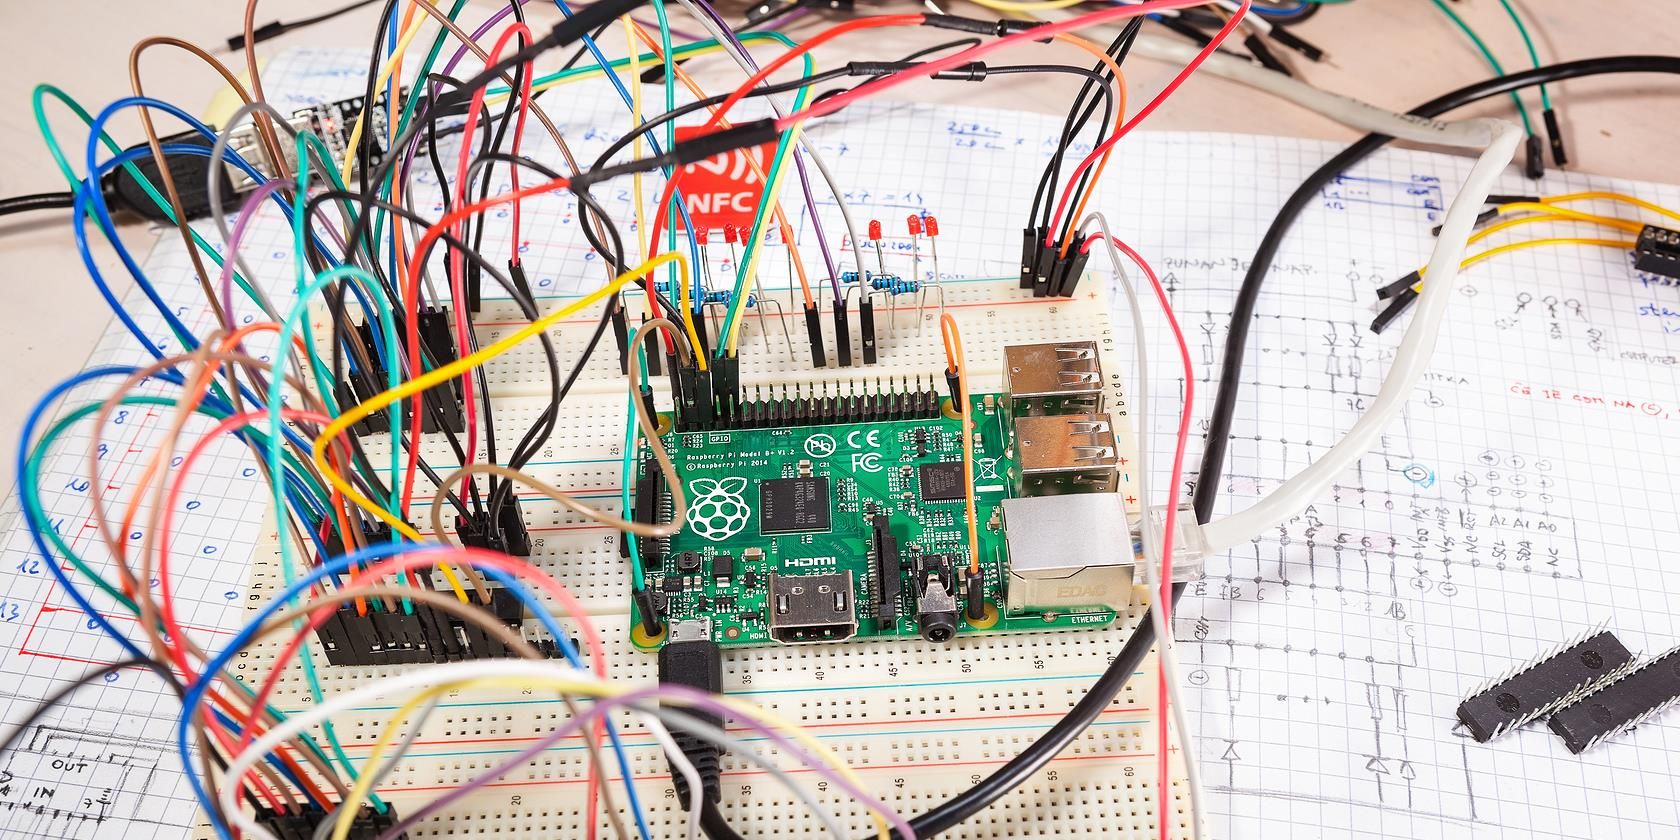
Your Raspberry Pi is a powerful little computer, a bit like a tiny brain for your projects, and you probably want to access it from anywhere. But, you know, leaving it open to the whole internet is a bit like leaving your front door wide open, isn't it? That's why learning to connect safely is so important, actually.
So, whether you're checking on a home automation system, managing a personal server, or just fiddling with some code, making sure your connection is secure keeps your data private and your device protected. It's really about peace of mind, basically.
We'll talk about the smart ways to set things up, avoiding those common pitfalls that can leave your Pi vulnerable. This guide will help you understand how to keep your projects and information safe when you reach out to your Pi from afar, you know.
Table of Contents
- Why Security Matters for Your Raspberry Pi
- Getting Started: Basic Security Measures
- Secure Remote Access Methods
- Advanced Security Tips for Your Raspberry Pi
- Troubleshooting Secure Connections
- Frequently Asked Questions
Why Security Matters for Your Raspberry Pi
Your Raspberry Pi, small as it is, can be a target if it's not set up carefully. It's connected to your network, and sometimes directly to the internet, which means it can be seen by others, you know. Protecting it is just good practice, basically.
Many people use their Pi for important things, like storing files, running smart home systems, or even hosting websites. If someone gets access to your Pi, they could mess with your projects, steal your information, or even use your Pi for their own purposes without you knowing, which is a bit scary, right?
The Risks of Open Connections
Leaving your Raspberry Pi with default settings or without any protection is a bit like leaving your house unlocked with a sign saying "come on in." There are automated programs, sometimes called bots, that constantly scan the internet looking for devices that are easy to get into, you see. These bots try common usernames and passwords, or look for known weaknesses, and that's a problem, arguably.
If they find an open door on your Pi, they can get in. Once inside, they could install harmful software, steal your private files, or even use your Pi to attack other systems. This can happen very quickly, too it's almost, so you really want to be prepared, you know.
Protecting Your Data and Device
Securing your Pi means keeping your personal information safe. If you have any sensitive files on your Pi, or if it controls devices in your home, you definitely want to make sure only you can access it. It's about maintaining control over your own digital space, as a matter of fact.
A well-secured Pi also means it won't be used as a stepping stone for someone to get into the rest of your home network. Think of it as a strong link in your overall home security chain. Every bit of protection helps, and a secure Pi is a very important part of that, really.
Getting Started: Basic Security Measures
Before you even think about connecting remotely, there are some simple steps you should take right away. These are the foundational pieces of security for your Raspberry Pi, and they make a big difference, you know.
Changing Default Credentials
When you first set up a Raspberry Pi, it usually comes with a standard username and password, like 'pi' and 'raspberry'. These are widely known, and that makes them a very big risk. The first thing you should do is change these, like your, to something unique, definitely.
Choose a username that isn't obvious, and pick a password that is long and complex. Don't use your birthday or your pet's name. Mix in capital letters, small letters, numbers, and symbols. This makes it much harder for someone to guess or to use automated tools to try and break in, basically.
This simple step is often overlooked, but it's one of the most effective ways to stop common, automated attacks. It's your first line of defense, so it's a good place to start, you know.
Keeping Your Pi Updated
Software updates aren't just about getting new features; they often include important security fixes. Developers find weaknesses in the software, and then they release updates to patch those holes. If you don't update, those holes stay open, which is a bit of a problem, isn't it?
Regularly running `sudo apt update` and `sudo apt upgrade` on your Pi is a very good habit. It keeps your operating system and all its programs current, closing off known vulnerabilities that attackers might try to use. This is a fairly easy thing to do, and it helps a lot, you know.
It's like getting your car serviced; you fix small problems before they become big ones. Keeping your Pi's software fresh is a simple way to maintain its health and security, you know, and it's something you should do often, really.
Strong Passwords and SSH Keys
We've talked about changing default passwords, but let's talk more about making them truly strong. A strong password is one that is hard to guess and long enough to resist brute-force attacks. Think of a phrase, not just a single word, you know. Using a password manager can help you create and remember these complex passwords, which is very helpful, actually.
Beyond passwords, SSH keys offer a much higher level of security for remote connections. It's a bit like having a special, unique digital fingerprint for your computer that only your Pi recognizes. This makes it incredibly difficult for anyone else to get in, even if they somehow guess your password, which is pretty neat, you know.
Setting up SSH keys involves creating a pair: a public key that you put on your Pi, and a private key that stays on your computer. When you connect, your computer uses the private key to prove its identity to the Pi. This method is much safer than just relying on passwords alone, and it's a step many people take for serious security, you know. It's a bit like how some services require you to securely upload your documents with a special link, ensuring only the right people can access them.
Secure Remote Access Methods
Once your basic security is in place, you can think about how you'll actually connect to your Pi from a distance. There are several good ways to do this, each with its own benefits, you know.
SSH: The Go-To for Secure Shell
SSH, or Secure Shell, is probably the most common way people connect to their Raspberry Pi remotely. It provides a secure, encrypted connection, meaning anything you type or any data you send between your computer and the Pi is scrambled, making it unreadable to anyone else, which is very important, actually.
It's like having a private, coded conversation directly with your Pi, no one else can listen in. This is a much better option than using insecure methods that send information in plain text, which is something you definitely want to avoid, you know.
Setting Up SSH
SSH is usually enabled by default on recent Raspberry Pi OS versions, but if not, you can turn it on easily. You can do this through the Raspberry Pi Configuration tool or by creating an empty file named `ssh` in the boot partition of your SD card. It's a pretty simple step, but a very important one, you know.
Once enabled, you can connect from another computer using an SSH client. On Linux or macOS, you just open a terminal and type `ssh username@ip_address_of_pi`. On Windows, you might use a tool like PuTTY or the built-in OpenSSH client, which is available now, too it's almost. It's a straightforward process to get that first connection going, you know.
SSH Key Authentication
Setting up SSH keys is a big step up from just using passwords, you know. It's a bit like having a very special, unguessable key for your front door instead of a combination lock that someone could try to brute-force, arguably. This method uses a pair of keys: a public key that lives on your Raspberry Pi and a private key that stays safe on your personal computer, actually.
When you try to connect, your computer uses its private key to prove it's really you to the Pi. The Pi then checks this against the public key it has. If they match, you're in. This is a very secure way to connect because the private key never leaves your machine, and it's practically impossible to guess, really.
To get this going, you'll first generate these keys on your computer. Then, you copy the public key over to your Raspberry Pi. There are clear steps for this process, making it quite straightforward once you know how. It’s a good idea to protect your private key with a strong passphrase, adding another layer of security, you know. You can learn more about generating SSH keys from reputable sources.
Disabling Password Login for SSH
Once you have SSH key authentication working, you can actually turn off password-based logins for SSH. This is a very strong security measure. It means that even if someone knows your password, they still can't get in without your private key, which is a huge barrier for attackers, you know.
You do this by editing the SSH configuration file on your Pi. It's a small change, but it makes a massive difference in how secure your remote access is. Just make sure your SSH keys are working perfectly before you do this, because otherwise, you might lock yourself out, which would be a bit of a bummer, wouldn't it?
Changing the Default SSH Port
By default, SSH uses port 22. This is well-known, and many automated scanners look for open port 22s. Changing your SSH port to a different, non-standard number (like 2222 or 22000) won't stop a determined attacker, but it will make your Pi less visible to those casual, automated scans, you know.
It's a bit like moving your front door to the back of the house; it's still there, but fewer people will stumble upon it by accident. This is another setting you can change in the SSH configuration file. Just remember the new port number, because you'll need it every time you connect, of course.
VPN: A Private Tunnel
A Virtual Private Network, or VPN, creates a secure, encrypted tunnel between your computer and your home network, where your Raspberry Pi lives. It makes it seem like your remote device is actually right there on your home network, even if you're across the country, which is pretty cool, you know.
This means all your traffic to and from your Pi, and even other devices on your home network, goes through this secure tunnel. It's a very comprehensive way to secure your remote access, especially if you have multiple devices you want to reach, you know.
Why Use a VPN?
Using a VPN provides a layer of privacy and security that goes beyond just SSH. It encrypts all your network traffic, not just your SSH connection. So, if you're also accessing web interfaces on your Pi or other services, they'll be protected too, which is a nice bonus, really.
It's especially good if you're connecting from public Wi-Fi networks, which can be quite risky. A VPN shields your entire session from prying eyes, making it much harder for anyone to snoop on what you're doing. It gives you a lot of peace of mind, definitely.
Setting Up a VPN Server on Your Pi
You can turn your Raspberry Pi into your very own VPN server. There are several open-source VPN solutions you can install, like OpenVPN or WireGuard. These are powerful tools, and while setting them up takes a bit more effort than just enabling SSH, there are many guides available to help you through the process, you know.
Having your own VPN server means you control the security. You don't rely on a third-party VPN provider, which gives you complete ownership of your data's path. It's a bit of a project, but it's very rewarding for the security it provides, as a matter of fact.
Reverse SSH Tunneling
Sometimes your Raspberry Pi might be behind a router that you can't configure for port forwarding, or it might not have a public IP address. In these situations, a reverse SSH tunnel can be a clever workaround, you know. It's a bit like your Pi reaching out to an intermediary server, creating a connection back to itself, so you can then connect through that server.
Your Pi initiates the connection to a publicly accessible server that you control. Then, you connect to that public server, and it forwards your connection back to your Pi through the tunnel. This is a bit more advanced, but it solves a common problem for people who can't directly open ports on their home router, you know.
It's a very useful trick for reaching Pis that are in tricky network setups. It essentially punches a hole through firewalls from the inside out, allowing you to establish a connection where one might not otherwise be possible, which is pretty handy, really.
Using a Cloudflare Tunnel or Similar Service
For those who want to expose web services running on their Pi (like a personal website or a home dashboard) without opening ports on their router, services like Cloudflare Tunnels offer a secure solution. These services create an outbound-only connection from your Pi to their network, which then handles incoming requests, you know.
This means your Pi never directly faces the internet, and all traffic goes through the secure service provider. It adds a layer of protection and often includes features like DDoS mitigation and SSL encryption automatically. It's a modern way to securely publish services from your home network, and it's quite popular, actually.
It's a very good option if you're looking to share something from your Pi with others, or access it via a web browser, without dealing with complex router settings or exposing your home IP address directly. It makes things simpler and safer, definitely.
Advanced Security Tips for Your Raspberry Pi
Once you've got the basics down and chosen your remote access method, there are even more steps you can take to harden your Raspberry Pi's security. These are extra layers of protection that can make a big difference, you know.
Firewall Configuration
A firewall acts like a bouncer for your network, deciding what traffic is allowed in and out of your Pi. By default, many Raspberry Pi setups might not have a strict firewall in place. Setting one up, like using UFW (Uncomplicated Firewall), allows you to specify exactly which ports and services can be accessed, you know.
For example, you can configure your firewall to only allow SSH connections from specific IP addresses, or only on your chosen custom port. This significantly reduces the attack surface, meaning there are fewer ways for unwanted traffic to get in. It's a very effective way to control who can talk to your Pi, really.
It's a bit like putting up a gate around your property, only letting in those you expect. This is a powerful tool for network security and something every Pi owner should consider, you know.
Fail2Ban: Protecting Against Brute-Force Attacks
Brute-force attacks are when someone repeatedly tries to guess your password. Fail2Ban is a tool that helps stop these kinds of attacks. It monitors your Pi's log files for repeated failed login attempts (like on SSH), and if it sees too many from the same IP address, it temporarily blocks that IP address, you know.
This makes it much harder for attackers to keep trying to guess your password, as they'll quickly get blocked. It's an automated way to defend against a very common type of attack, and it works in the background, which is pretty convenient, actually.
Installing and configuring Fail2Ban is a smart move for any Pi that's exposed to the internet. It adds a very practical layer of defense, making your Pi a much less appealing target for those trying to break in, definitely.
Two-Factor Authentication (2FA)
Two-factor authentication adds another layer of security beyond just a password or even SSH keys. It usually involves something you know (your password or passphrase) and something you have (like a code from your phone or a physical key). So, even if someone gets your password, they still can't get in without that second factor, you know.
You can set up 2FA for SSH logins on your Raspberry Pi. This might involve using an app on your phone that generates time-based codes. It makes your login process a tiny bit longer, but the added security is very much worth it, especially for sensitive systems, as a matter of fact.
It's a bit like having two locks on your door, where you need two different keys. This is a very strong security practice that many online services use, and you can bring that same level of protection to your Pi, too it's almost.
Regular Backups
Even with all these security measures, things can still go wrong. A hardware failure, a corrupted SD card, or even a successful attack could mean losing all your work. That's why regular backups are so important, you know.
Make copies of your Raspberry Pi's SD card, or at least your important data and configuration files. Store these backups in a safe place, ideally off-site or on a separate drive. If something happens to your Pi, you can restore it from a backup and be back up and running quickly, which is a huge relief, honestly.
Think of it as an insurance policy for your projects. It won't prevent an attack, but it will save you a lot of headache if one occurs. It's a very simple step that provides immense peace of mind, definitely.
Physical Security
All the digital security in the world won't help if someone can just walk up to your Raspberry Pi and unplug it or take the SD card. Make sure your Pi is kept in a secure location, out of sight and reach of unauthorized people, you know.
If your Pi is in a public or semi-public space, consider putting it in a locked enclosure. This prevents tampering and theft. It's easy to forget about physical security when thinking about remote access, but it's just as important as the digital side, really.
A secure physical location is the first line of defense for any computer. So, make sure your little Pi is tucked away safely where it belongs, basically.
Troubleshooting Secure Connections
Even with everything set up correctly, you might sometimes run into issues when trying to connect. It happens, and usually, there's a simple explanation. Knowing where to look can save you a lot of frustration, you know.
Common Connection Issues
One of the most common problems is getting the IP address wrong. Your Pi's IP address might change if your router assigns new ones. You can check your Pi's current IP address directly on the device or through your router's administration page, actually.
Another common issue is forgetting to enable SSH on the Pi, or having a firewall (either on your Pi or your router) blocking the connection. Always double-check these settings if you can't connect. Sometimes, a simple restart of the Pi or your router can clear up temporary network glitches, too it's almost.
Also, make sure you're using the correct username and password, or that your SSH keys are in the right place and have the correct permissions. These small details can often be the cause of a connection problem, you know.
Checking TLS Security Settings
Sometimes,


Detail Author:
- Name : Mr. Sim Friesen
- Username : ansel38
- Email : gus64@friesen.biz
- Birthdate : 1986-01-31
- Address : 4276 Hettinger Mission West Irwinmouth, MT 14105
- Phone : +1-907-393-8153
- Company : Quitzon Inc
- Job : Human Resources Manager
- Bio : Mollitia iste quos omnis nostrum non sed occaecati. Adipisci voluptatibus rerum sit est expedita nulla quis sed. Hic eum minus eum omnis architecto. Repudiandae id cumque voluptas.
Socials
twitter:
- url : https://twitter.com/brown1994
- username : brown1994
- bio : Nihil atque inventore aut debitis ipsa. Quos doloribus magnam earum aut voluptatibus iusto. Cum quia est sit aut.
- followers : 5190
- following : 1194
linkedin:
- url : https://linkedin.com/in/brown2023
- username : brown2023
- bio : A placeat veritatis ullam error.
- followers : 6223
- following : 1701
tiktok:
- url : https://tiktok.com/@brownm
- username : brownm
- bio : Dolorem voluptates suscipit odit omnis autem consectetur dignissimos.
- followers : 667
- following : 395
instagram:
- url : https://instagram.com/marion.brown
- username : marion.brown
- bio : Quasi autem voluptatem saepe quidem. Saepe quam officiis harum molestiae.
- followers : 1282
- following : 2067


 Bonus
Bonus